Publishing mobile apps is still the same tedious process - push updates to the store, wait for approval, and hope users update their app. Got a bug? Welcome to emergency patch mode.
What if you could skip this entire update cycle? Server-Driven UI lets you push updates instantly and control the UI directly from your server with no delays or approvals.
What is Client-Driven UI?
(Image source: Stac)
In Client-Driven UI, your app's UI is connected to its codebase. The client handles everything - UI layouts, business logic, and rendering. Want to change a button or add a feature? You need to update the code, test it, and push the update to app stores. Then wait for store approvals and users to update their apps.
This approach has limitations:
Slow update cycles: Minor UI changes require full updates
Scalability problems: Managing multiple platforms is difficult
Lack of flexibility: Changes aren't instant
What is Server-Driven UI (SDUI)?
Server-Driven UI means the server controls the UI instead of hardcoding it in the app. The client focuses on how to render components sent by the server.
Think of it like a browser displaying a website. Your browser doesn't know what content it will show - it just knows how to render HTML tags. Similarly, in SDUI, the app renders widgets sent by the server, making the UI dynamic and server-controlled.
How Server-Driven UI works:
The server defines the app's UI in JSON format
The client receives these definitions and renders the UI dynamically
Any UI changes? Just update the server, and the app reflects them instantly
Building Server-Driven UI is challenging - you need to support Flutter widgets, manage navigation, handle network calls, and manage state efficiently. That's where Stac helps.
Introducing Stac
Meet Stac (formerly Mirai), the powerful Server-Driven UI (SDUI) framework built specifically for Flutter. With Stac, you can build beautiful, cross-platform applications dynamically, using JSON to define your UI in real time.
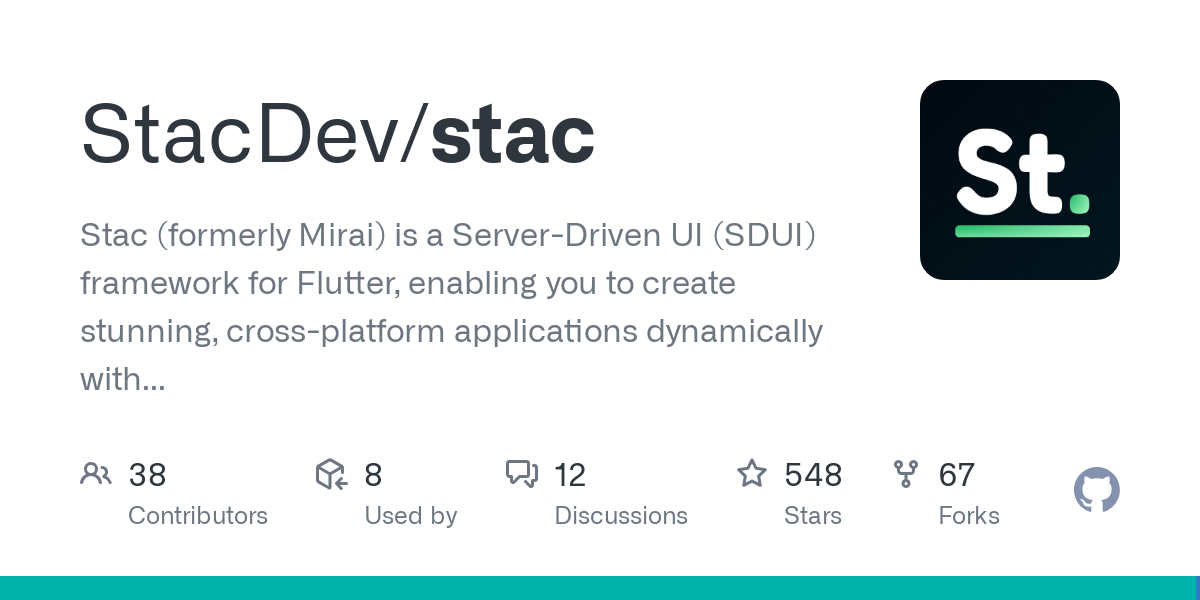
GitHub: StacDev/stac
Installing Stac
To get started with Stac, follow these installation steps:
1. Add the Stac dependency to your pubspec.yaml file: Run this command:
flutter pub add stac
This will add Stac to your package's pubspec.yaml (and run an implicit flutter pub get):
Alternatively, you can manually add the dependency to your app within your pubspec.yaml:
dependencies:
  stac: ^<latest-version>
2. Run this command in your terminal to install the package:
flutter pub get
3. Import the Stac package in your Dart file:
import 'package:stac/stac.dart';
Now you're ready to start using Stac in your Flutter project.
Initializing Stac
In the main function, initialize Stac to set up the necessary configurations and prepare your app for rendering UI from JSON.
void main() async {
  await Stac.initialize();
  runApp(const MyApp());
}
That's it. Now that your app is SDUI-ready, you can use Stac.fromJson(), Stac.fromAsset(), or Stac.fromNetwork() methods to render UI.
Defining Stac JSONs
Stac JSONs are designed to feel familiar, especially if you've worked with Flutter's widget structure. In fact, Stac JSONs are basically the JSON equivalent of Flutter widgets — they mirror the same hierarchy and logic, just in a different format.
Here's the magic: if you can write a Flutter widget tree, you can easily define a Stac JSON. Let's compare:
Flutter Widget:
Column(
  children: [
    Text("Hello, Stac!"),
    ElevatedButton(
      onPressed: () => print("Button Pressed"),
      child: Text("Click Me"),
    ),
  ],
)
Stac JSON Equivalent:
{
  "type": "column",
  "children": [
    {
      "type": "text",
      "data": "Hello, Stac!"
    },
    {
      "type": "elevatedButton",
      "onPressed": {
          "action": "print",
          "message": "Button Pressed"
        },
        "child": {
          "type": "text",
          "data": "Click Me"
        }
    }
  ]
}
See the similarity? It's like translating your Flutter widgets into JSON. The structure stays intuitive, so you're not learning a completely new system — you're just writing Flutter in JSON form.
Key Benefits of Stac
Instant UI updates: Skip the hassle of app updates and store approvals. With SDUI, changes made on the server go live instantly, ensuring your app stays current at all times.
Easy personalization: Deliver unique, customized experiences to users by serving different UIs based on preferences, behaviors, or demographics — all without touching client-side code.
Simplified maintenance: Manage your UI logic centrally on the server. This reduces the complexity of maintaining multiple app versions and keeps updates consistent across platforms.
Easy A/B testing: Experiment with multiple UI versions in real-time by serving different payloads directly from the server. Get insights and iterate faster without additional development cycles.
Reduced development overhead: Focus your efforts on backend logic while the server handles UI updates. This minimizes client-side development, making your workflow faster and more efficient.
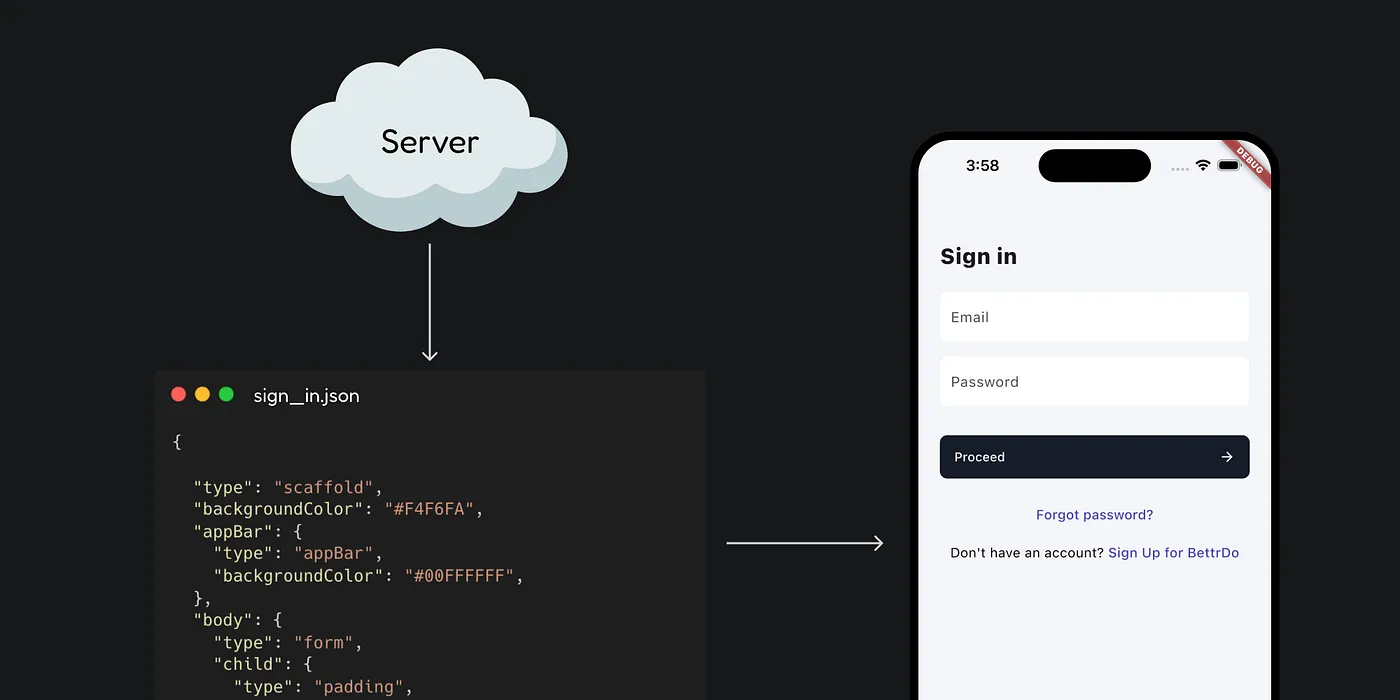
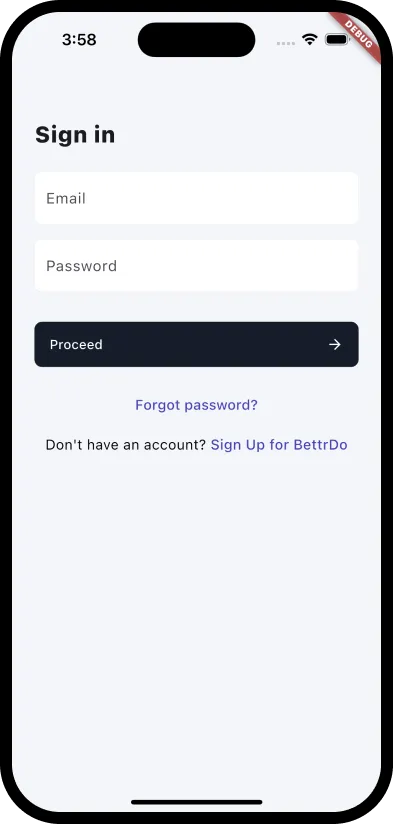
Form Screen Example with Stac
Let's see Stac in action by building a simple Sign-In Screen.
(Image source: Stac)
Server-Side JSON Definition
Here's how the server defines the Sign-In screen in Stac JSON:
{
  "type": "scaffold",
  "backgroundColor": "#F4F6FA",
  "appBar": {
    "type": "appBar",
    "backgroundColor": "#00FFFFFF",
  },
  "body": {
    "type": "form",
    "child": {
      "type": "padding",
      "padding": {"left": 24, "right": 24},
      "child": {
        "type": "column",
        "crossAxisAlignment": "start",
        "children": [
          {
            "type": "text",
            "data": "Sign in",
            "style": {"fontSize": 24, "fontWeight": "w800", "height": 1.3}
          },
          {"type": "sizedBox", "height": 24},
          {
            "type": "textFormField",
            "id": "email",
            "autovalidateMode": "onUserInteraction",
            "validatorRules": [
              {"rule": "isEmail", "message": "Please enter a valid email"}
            ],
            "style": {"fontSize": 16, "fontWeight": "w400", "height": 1.5},
            "decoration": {
              "hintText": "Email",
              "filled": true,
              "fillColor": "#FFFFFF",
              "border": {
                "type": "outlineInputBorder",
                "borderRadius": 8,
                "color": "#24151D29"
              }
            }
          },
          {"type": "sizedBox", "height": 16},
          {
            "type": "textFormField",
            "autovalidateMode": "onUserInteraction",
            "validatorRules": [
              {"rule": "isPassword", "message": "Please enter a valid password"}
            ],
            "obscureText": true,
            "maxLines": 1,
            "style": {"fontSize": 16, "fontWeight": "w400", "height": 1.5},
            "decoration": {
              "hintText": "Password",
              "filled": true,
              "fillColor": "#FFFFFF",
              "border": {
                "type": "outlineInputBorder",
                "borderRadius": 8,
                "color": "#24151D29"
              }
            }
          },
          {"type": "sizedBox", "height": 32},
          {
            "type": "filledButton",
            "style": {
              "backgroundColor": "#151D29",
              "shape": {"borderRadius": 8}
            },
            "onPressed": {
              "actionType": "none",
            },
            "child": {
              "type": "padding",
              "padding": {"top": 14, "bottom": 14, "left": 16, "right": 16},
              "child": {
                "type": "row",
                "mainAxisAlignment": "spaceBetween",
                "children": [
                  {"type": "text", "data": "Proceed"},
                  {
                    "type": "icon",
                    "iconType": "material",
                    "icon": "arrow_forward"
                  }
                ]
              }
            }
          },
          {"type": "sizedBox", "height": 16},
          {
            "type": "align",
            "alignment": "center",
            "child": {
              "type": "textButton",
              "onPressed": {
                "actionType": "none",
              },
              "child": {
                "type": "text",
                "data": "Forgot password?",
                "style": {
                  "fontSize": 15,
                  "fontWeight": "w500",
                  "color": "#4745B4"
                }
              }
            }
          },
          {"type": "sizedBox", "height": 8},
          {
            "type": "align",
            "alignment": "center",
            "child": {
              "type": "text",
              "data": "Don't have an account? ",
              "style": {
                "fontSize": 15,
                "fontWeight": "w400",
                "color": "#000000"
              },
              "children": [
                {
                  "data": "Sign Up for BettrDo",
                  "style": {
                    "fontSize": 15,
                    "fontWeight": "w500",
                    "color": "#4745B4"
                  }
                }
              ]
            }
          }
        ]
      }
    }
  }
}
Client-Side Implementation
Here's how to render the server-defined UI on the client side using the Stac.fromNetwork method.
import 'package:flutter/material.dart';
import 'package:stac/stac.dart';

void main() async {
  await Stac.initialize();
  runApp(const MyApp());
}

class MyApp extends StatelessWidget {
  const MyApp({super.key});

  @override
  Widget build(BuildContext context) {
    return MaterialApp(
      title: 'Stac App',
      theme: ThemeData(),
      home: Stac.fromNetwork(
        request: StacNetworkRequest(
          url: 'https://example.com/ui.json',
        ),
        context: context,
      ),
    );
  }
}
With just a few lines of code and a JSON definition, you've got a dynamic sign-in screen powered by Stac. It's that simple!
Conclusion
Server-Driven UI is transforming how we build mobile apps, and Stac makes it accessible for Flutter developers. With Stac, you can push updates instantly without waiting for app store approvals, create personalized experiences for different users, and test new features in real-time. The framework's JSON-based approach feels natural to Flutter developers while providing the flexibility to iterate quickly and respond to user needs immediately. Whether you're building a simple form or a complex application, Stac empowers you to focus on creating great user experiences while the server handles UI updates seamlessly. The future of mobile development is here, and Stac helps you build it with confidence and speed.