This article shows how to implement a message‑driven workflow in NestJS using its built‑in Event Bus together with Redis‑backed Bull queues. As a concrete use case, we’ll send a verification email whenever a new user registers. By using events, we decouple user registration from email delivery, making our system more modular, easier to test, and resilient to email service failures. Bull plays a key role in this setup by handling background jobs with built-in support for retries, delayed execution, and failure recovery, ensuring reliable and fault-tolerant message processing.
To follow along, you should have at least a basic understanding of how NestJS and its module system work.
Architecture overview
We glue together three pieces:
NestJS Event Bus (CqrsModule) for in‑process notifications.
Bull queues (via @nestjs/bull) backed by Redis for reliable background jobs.
MailerService for actual email delivery.
In this example, all components share the same Redis instance so there’s no need to operate multiple brokers.
1. First, register the queue as a module:
@Global()
@Module({
  imports: [
    BullModule.forRootAsync({
      imports: [AppConfigModule],
      inject: [AppEnvConfigService],
      useFactory: (config: AppEnvConfigService) => ({
        redis: { host: config.redisHost, port: config.redisPort },
      }),
    }),
    BullModule.registerQueue({ name: MAIL_PROCESS_TOKEN }),
    MailModule,
  ],
  providers: [
    { provide: EmailGateway, useClass: MailQueueService },
    MailProcessor,
  ],
  exports: [EmailGateway, BullModule],
})
export class QueueModule {}
This sets up a Redis-backed queue named mail and binds the custom EmailGateway interface to the MailQueueService implementation. These components can be adapted to suit your specific use cases. For testing purposes, this article demonstrates how to configure a local SMTP server for email delivery.
As for the Redis module, the configuration shown here is based on my setup, but you can adjust it to match your own requirements. Make sure both the Redis and Queue modules are imported in your AppModule (or the corresponding root module of your application) to ensure they are properly initialized and available throughout your app.
2. Next step, define the event:
export class UserRegistered {
  constructor(
    public readonly userId: number,
    public readonly email: string,
    public readonly username: string,
    public readonly verificationCode: string,
  ) {}
}
We publish this event any time a new user is registered. We could have any other event here, such as to send the welcome email after users verify their account, trigger a referral bonus process, log the registration activity for analytics, etc.
3. Publish the event within the service/use-case layer:
@Injectable()
export class UserRegistrationService {
  constructor(private readonly userService: UserService) {}

  async signUp(registerDto: RegisterDto): Promise<MessageDto> {
    await this.userService.create(registerDto);
    return { message: 'Account created successfully' };
  }

  // any other related service here
}
Whenever you call signUp, an event is emitted. Later we’ll subscribe to it.
4. Enqueue jobs via an interface, here we use our interface EmailGateway:
@Injectable()
export class MailQueueService implements EmailGateway {
  constructor(
    @InjectQueue(MAIL_PROCESS_TOKEN) private readonly mailQueue: Queue,
  ) {}

  async enqueueVerification(
    to: string,
    username: string,
    code: string,
  ): Promise<void> {
    await this.mailQueue.add(
      SEND_VERIFICATION_PROCESS_TOKEN,
      { to, username, code },
      { attempts: 5, backoff: { type: 'fixed', delay: 1000 } },
    );
  }

   // any other related service here
}
enqueueVerification schedules the verification job with retries and fixed backoff. The .add() method supports various configuration options, choose the ones that best suit your use case. See the official documentation for full details.
5. Define the process job
@Processor(MAIL_PROCESS_TOKEN)
export class MailProcessor {
  constructor(private readonly mailService: MailService) {}

  @Process(SEND_VERIFICATION_PROCESS_TOKEN)
  async handleSendVerification(job: Job<{
    to: string; username: string; code: string;
  }>) {
    const { to, username, code } = job.data;
    await this.mailService.sendVerificationEmail(to, username, code);
  }

  // others related processing methods
}
The processor listens for incoming queue jobs and invokes the MailService for each task. Defining the correct token for each process is essential, as it determines how Bull maps jobs to their respective processors.
6. MailService implementation
@Injectable()
export class MailService {
  constructor(private readonly mailer: MailerService) {}

  async sendVerificationEmail(
    to: string, username: string, code: string
  ): Promise<void> {
    const confirmationUrl = `https://yourapp.com/verify?code=${code}`;
    await this.mailer.sendMail({
      to,
      subject: 'Confirm your email',
      template: 'verification',
      context: { username, confirmationUrl },
    });
  }
}
Actual email dispatch is handled here. Any failure bubbles up and can be retried by Bull.
7. Wire up the event handler:
@EventsHandler(UserRegistered)
export class SendVerificationEvent implements IEventHandler<UserRegistered> {
  constructor(private readonly mailQueue: MailQueueService) {}

  handle(event: UserRegistered) {
    // retry if fail to send email
    return this.mailQueue.enqueueVerification(
      event.email,
      event.username,
      event.verificationCode,
    );
  }
}
This handler listens for the UserRegistered event and delegates the email-sending task to the queue by calling enqueueVerification. It helps separate domain logic from infrastructure concerns and allows failed attempts to be retried automatically.
8. Invoke the event in your service
Finally, you need to publish the UserRegistered event at the point where a new user is created or when you issue a fresh verification code. In your user‑registration or any other service, inject the NestJS EventBus and call publish(...)
@Injectable()
export class UserService {
  constructor(
    private readonly eventBus: EventBus,
    private readonly userTokenService: UserTokenService,
    // … other injections
  ) {}

  async create(dto: CreateUserDto): Promise<User> {
    const result = await this.dataSource.transaction(async (manager) => {
      // atomic logic to handle rollbacks
      // e.g., create user, generate token, save to DB
    });

    const { user, verificationCode } = result;

    // Publish event to trigger email delivery
    this.eventBus.publish(
      new UserRegistered(user.id!, user.email, user.username, verificationCode),
    );

    return user;
  }
}
After this call, the UserRegistered event flows through the NestJS Event Bus, your SendVerificationEvent handler enqueues the Bull job, and MailProcessor delivers the verification email in the background.
Example flow
The client calls
POST /user, triggering a controller or resolver that invokesuserService.create(...).UserRegisteredevent is published.The
SendVerificationEventhandler receives the event and enqueues a Bull job viaMailQueueService.The
MailProcessorpicks up the job and callsMailService.sendVerificationEmail(...).If email delivery fails, Bull retries the job up to 5 times with a 1-second fixed delay (as configured).
Benefits
Zero‑config wiring thanks to Nest’s decorators (
@OnEvent,@Processor,@InjectQueue).Single infrastructure piece (Redis) powers both event transport and job persistence.
Built‑in retry logic, back‑off, and dead‑letter handling.
Easy horizontal scaling: add more workers or API nodes without changing code.
Simple monitoring via Bull UI tools for pending/failed jobs.
Bull also provides a web-based UI to inspect and manage queues. In this example, it is accessible at http://localhost:3010/queues/.
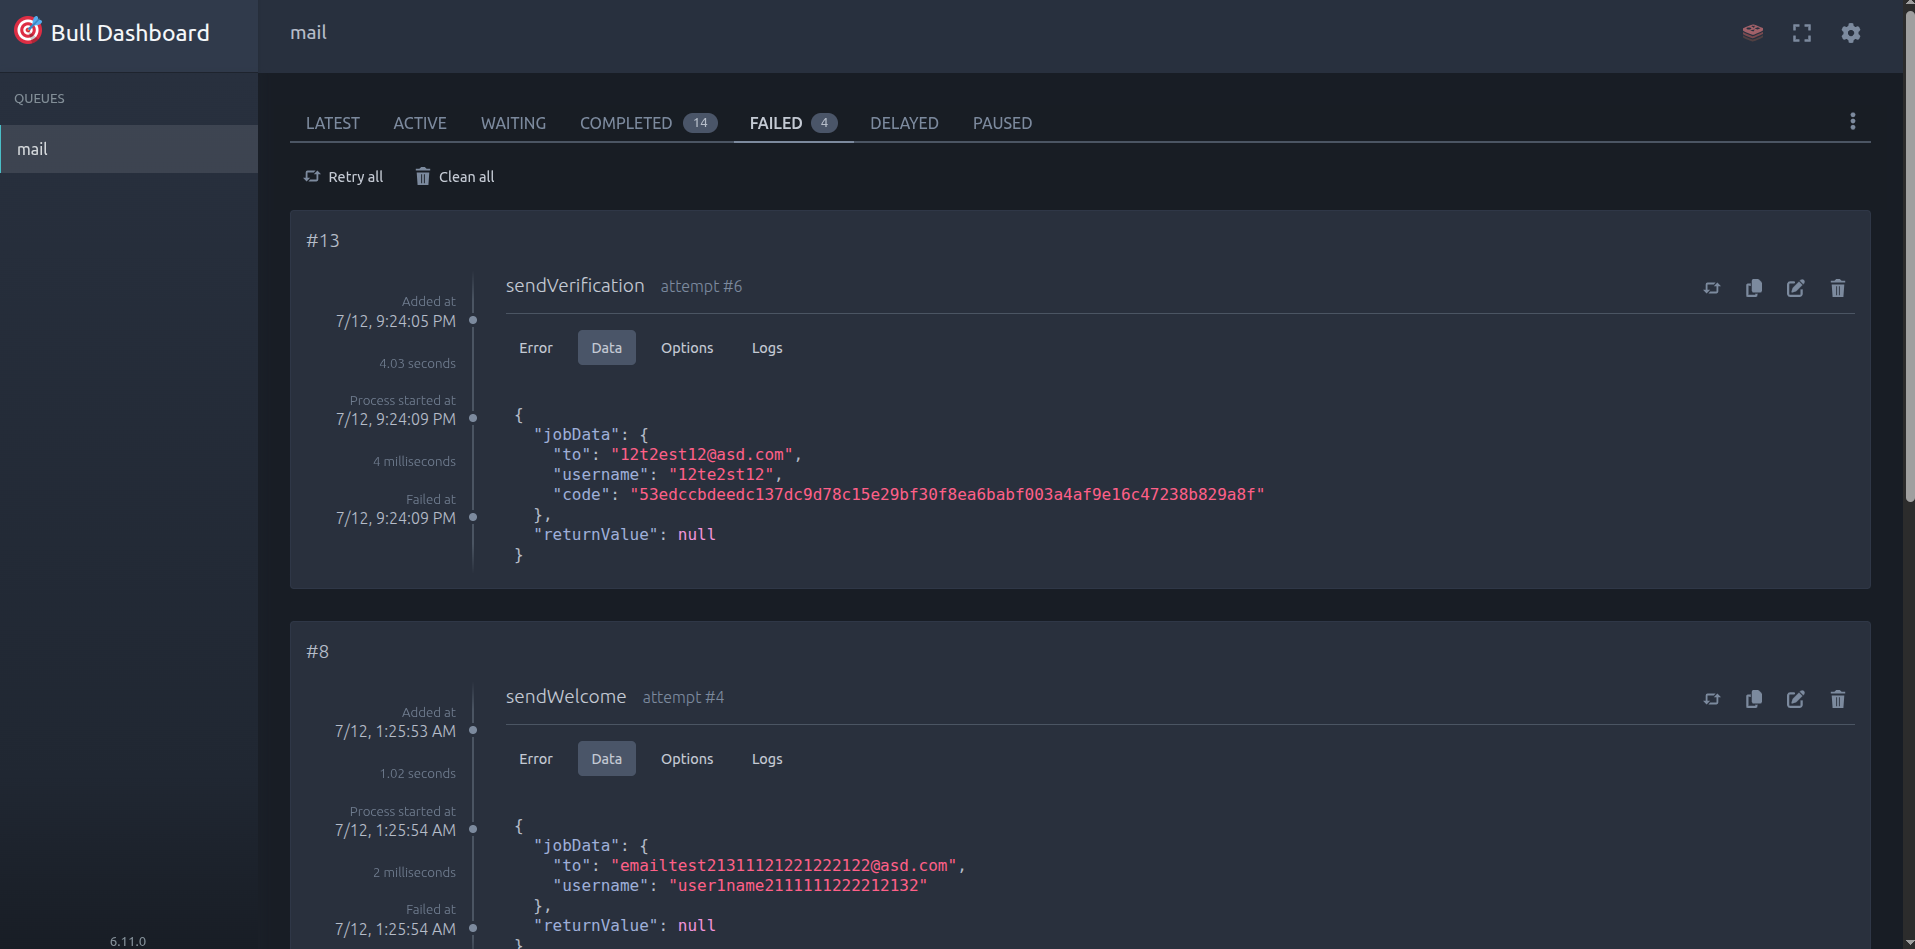
Through this panel, you can view job statuses, retry failed jobs, inspect logs, and examine queue parameters.
To set it up, add the following code to your main.ts (or index.ts):
export function registerBullBoard(
  app: INestApplication,
  mountPath: string,
  queueTokens: string[],
  env: AppEnvConfigService,
): void {
  const serverAdapter: ExpressAdapter = new ExpressAdapter();
  serverAdapter.setBasePath(mountPath);

  const adapters: BullAdapter[] = queueTokens.map((token) => {
    const q = app.get<Queue>(getQueueToken(token));
    return new BullAdapter(q);
  });

  createBullBoard({ queues: adapters, serverAdapter });
  app.use(
    mountPath,
    basicAuth({
      users: { [env.bullUser]: env.bullPassword },
      challenge: true,
    }),
    serverAdapter.getRouter(),
  );
}

async function bootstrap(): Promise<void> {
  const app: INestApplication = await NestFactory.create(AppModule);

  const env: AppEnvConfigService = app.get(AppEnvConfigService);

  registerBullBoard(app, '/queues', [MAIL_PROCESS_TOKEN], env);

  await app.listen(env.apiPort ?? 3010);
}

void bootstrap();
The basicAuth middleware is optional. You can remove it if you prefer to access the Bull UI without authentication during local development.
Conclusion
Besides Bull and the NestJS Event Bus, you could use messaging brokers like Kafka or RabbitMQ. The key question is: When should you choose a full-featured broker instead?
Use a dedicated broker when your system requires cross-language communication, strict message ordering, or persistent event storage. For most web applications and background job processing, the combination of the NestJS Event Bus and Bull provides reliable and low-overhead message handling.
You can find the full code repository here.

